*This post contains affiliate links. This means if you purchase using my link, I will earn a small commission.*
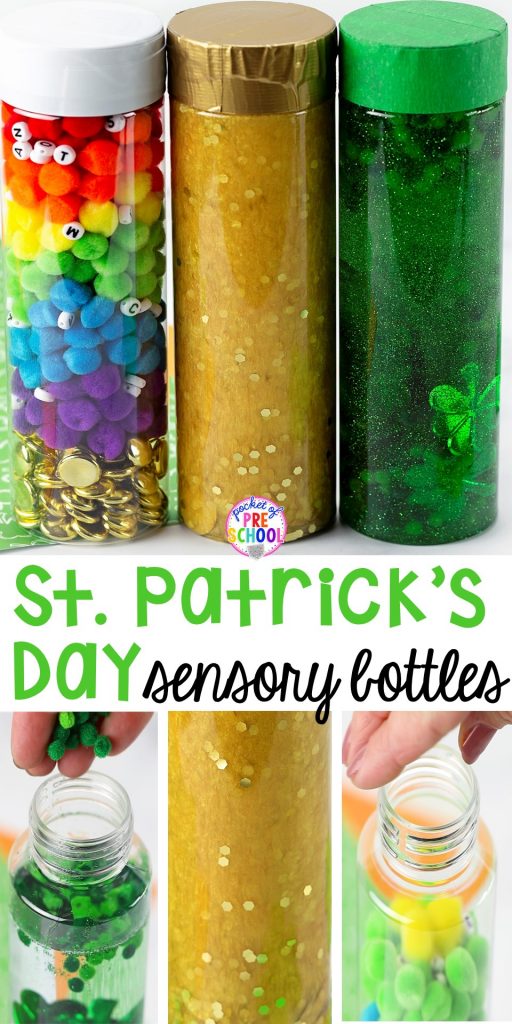
Gold at the End of the Rainbow – Letter Sensory Bottle
- empty bottle
- place gold gems or coins at the bottom (these are from Hobby Lobby)
- place pom poms in the bottle (purple, blue, green, yellow, orange, red) and sprinkle letter bead in after each color to make the beads all over the bottle
- fill to the top with water, leaving about 1/4 inch space at the top so there is room to shake
- hot glue or superglue the lid closed
- cover the top with white tape
- For extra letter fun, place a Letter I Spy worksheet (FREEBIE) out with the bottle so students can trace the letters as they find them!
Gold Sensory Bottle
- empty bottle
- fill halfway with water
- add 1/2 cup of clear glue
- pour in gold metallic paint (about 2 tablespoons)
- add gold large glitter sequins
- add gold circle sequins or table scatter
- fill to the top with water, leaving about 1/4 inch space at the top so there is room to shake
- hot glue or superglue the lid closed
- cover the top with gold tape

Clover Sensory Bottle
- empty bottle
- fill halfway with water
- add 1/2 cup of clear glue
- add green fine glitter and a few drops of green liquid watercolor
- add clover sequins or table scatter (this is from Hobby Lobby)
- add tiny green pom poms
- fill to the top with water, leaving about 1/4 inch space at the top so there is room to shake
- hot glue or superglue the lid closed
- cover the top with green tape
Those were so much fun to make, and I know my students are going to go bananas when they see them!


