Technology can be tricky and super frustrating, especially when it comes to printing. Honestly, sometimes makes me want to throw my printer out the window! But I’m here to help you quickly and easily print PDF documents for your classroom with ease and make them look like they should! Once you learn these tricks, you should never have issues printing all your PDFs again.
Grab the FREEBIE by entering your email in the box at the bottom of this post. This post contains affiliate links which means I earn a tiny commission when you use my links at no cost to you.

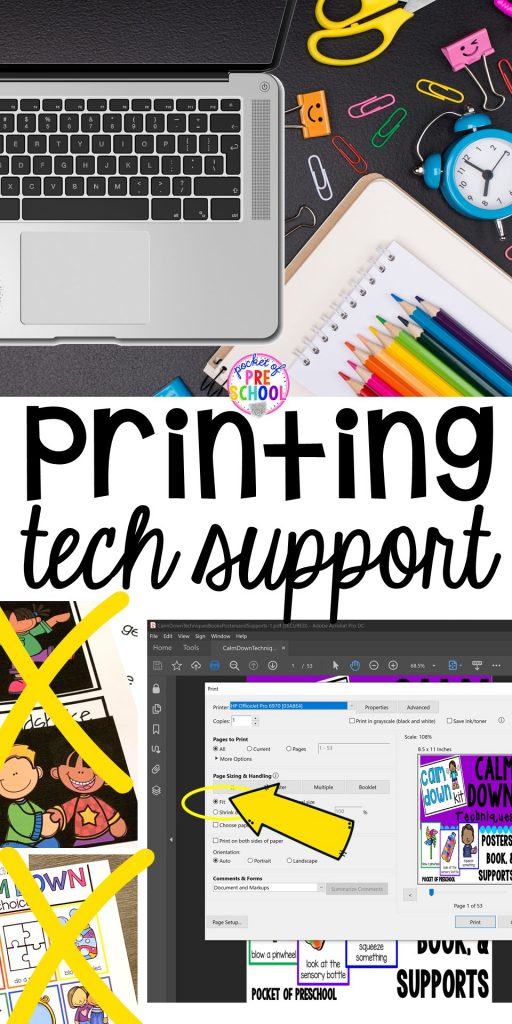
Dreaded black boxes and wonky margins! This drives people absolutely crazy and wastes so much ink. It is EASY to fix once you know what to do! Just open the file and print it in Adobe. It sounds simple, but it can be tricky so let me break it down for you.
You MUST open, edit, and print this product in Adobe Reader from a COMPUTER (not your phone) or NOT in preview mode (aka through your internet browser). You can download Adobe Reader for FREE online https://get.adobe.com/reader/.
Here’s what to do to make sure you are using ADOBE: (see image below)
- Download the file and CLOSE out of the internet. DO NOT OPEN IT ONLINE.
- Unzip the file if it’s a zipped file.
- Find the file on your computer (check the downloads folder), right-click on the file, and choose to OPEN WITH ADOBE READER.
- If your computer asks you to make Adobe your default printer, say YES.
Help! It’s still not working!
You are likely using a default PDF reader or in preview mode. It will NOT work with any other generic PDF reader or other default readers. You can download Adobe Reader for FREE online https://get.adobe.com/reader/

Never, ever, ever print a PDF from your phone. Some phones have glitches that make random black boxes! The problem does NOT lie with the file, so follow the steps above USING A COMPUTER.

If there is a large white border around the edges, you need to make sure you select “FIT” to page. Select the pages you want to print. Select “FIT” to ensure it prints correctly and doesn’t cut off the edges.

What if you don’t want to print EVERY page in the file?
This trick will save you so much time. You don’t have to write down the pages you need! Crazy, right?!
Here is a video to walk you through it!
- Click the page thumbnails icon.
- Slide the arrow in the middle of the screen over so you can see the individual pages easier.
- Hold the control key down and click the pages you want to print. The page will be highlighted around the edge once you select it.
- Click the “Print” icon
- Select “Fit” so the page prints to the edge of the page or if you want to print multiple pages to a page (aka print the pages smaller) select “Multiple”
- Select other options if you wish such as “Print in Grayscale”
- Select “Print” at the bottom
Print It Smaller! There are many times when you may want to print something smaller in the classroom.
Maybe you want to print something smaller for
- a pocket chart
- make a smaller book
- social story to send home with a student
- make a center game
- smaller to fit in a container more easily
- make a worksheet smaller to glue into a notebook
- print curriculum documents smaller to fit into your teacher binder
- the list goes on and on
It is simple once you do it a few times, I promise!
- Select File then “Print” or select the “Print” icon
- Select “Multiple”
- Click on the “Pages” per sheet and choose the number 2, 4, 6, 9, 16, or custom

Print it Bigger! There may be times when you want to print something bigger or make it into a poster. You can do that in Adobe too!
- Select File, then Print or select the Print icon
- Select Poster
- In the Tile Scale box, choose the percentage you want it to print
- Click the arrow to check how it will look when printed and pieced together

If you want to keep the tech support tricks handy, PRINT THIS TECH SUPPORT HANDOUT HERE.

Check out more of my favorite teacher hacks below!
Love it? Pin this image!


