 It’s cold outside so bring the seasonal fun inside with these winter-themed sensory bottles! Students will love shaking, wiggling, and observing these wintry sensory bottles! Place them in the science center or the safe place for students to experience these gorgeous additions to your classroom!
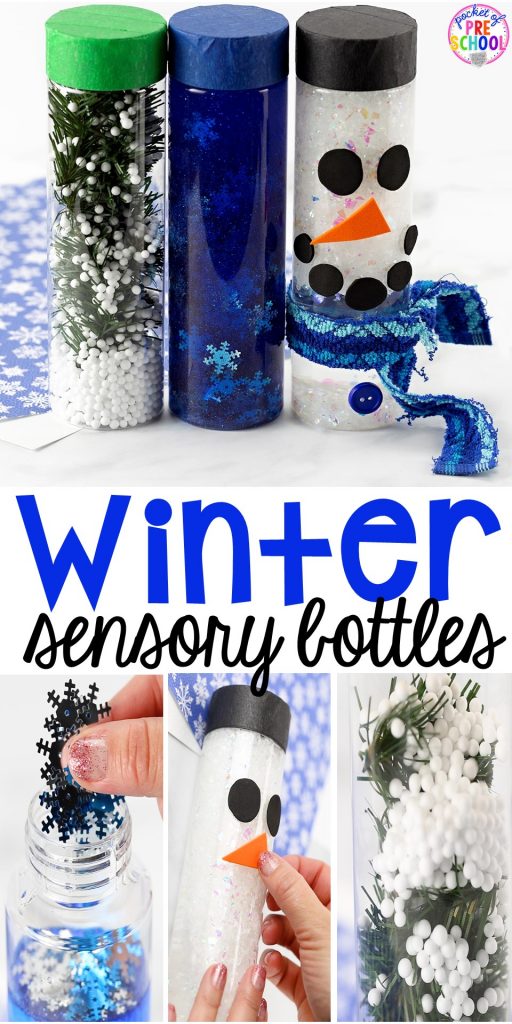
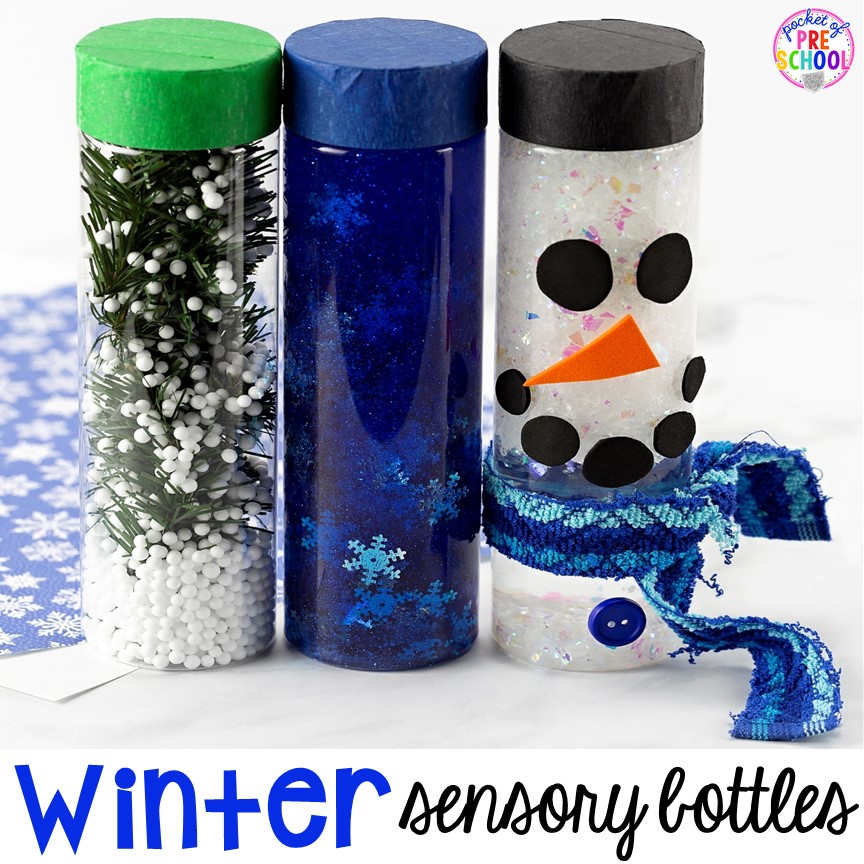
When I think of winter, I think of a tree covered in snow, a snowstorm, and a snowman. All of these things are outside where is it cold, or maybe you live somewhere warm where it does not snow. Bring a winter wonderland in the classroom by making fun sensory bottles that students can explore!
*This post contains referral links which means if you use my link I will get a tiny commission at no cost to you.
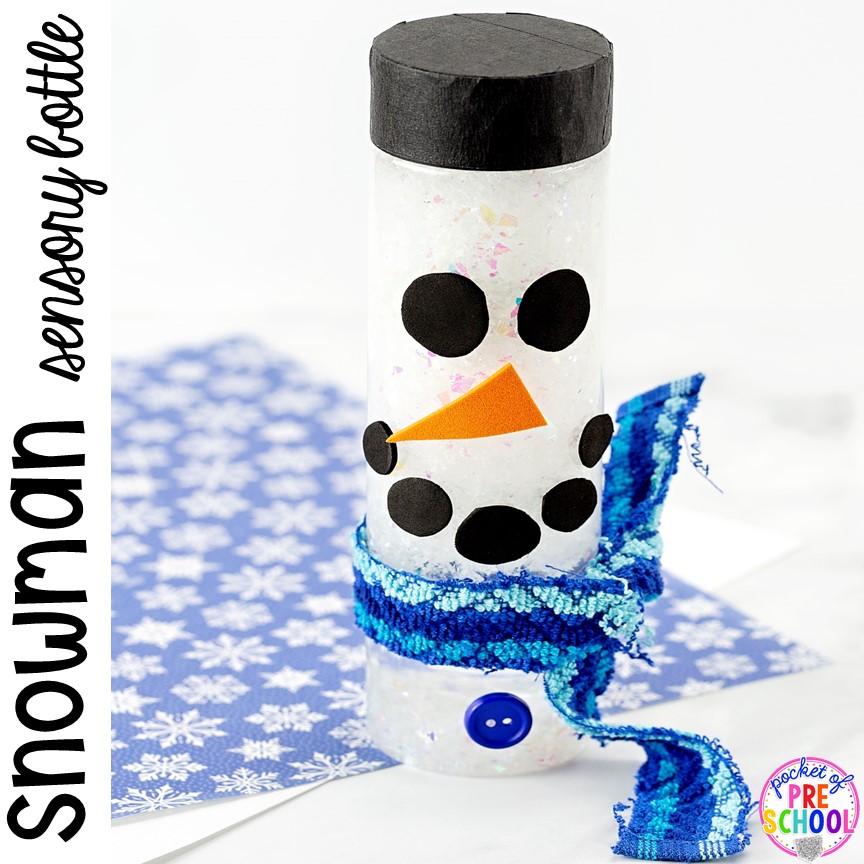
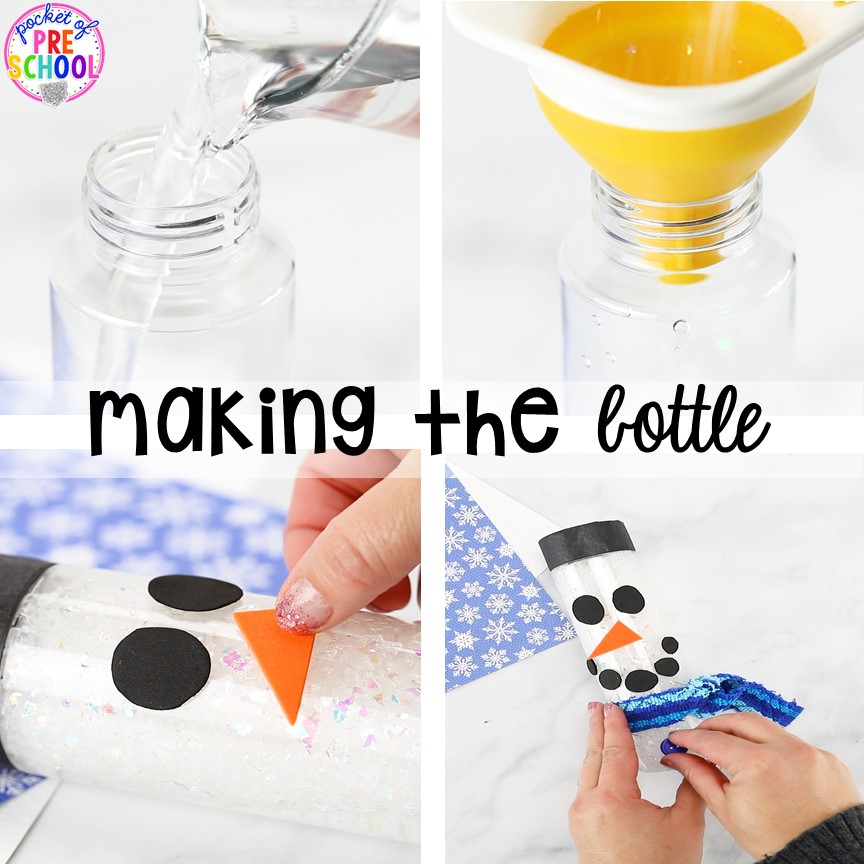
Snowman Sensory Bottle
- empty bottle
- fill halfway with water
- fill to the top with fake glittery snow
- fill to the top with water, leaving about 1/2 inch space at the top so there is room to shake
- hot glue or superglue the lid closed
- cover the top with black tape
- glue eyes, nose, and a mouth to the bottle (make using craft foam)
- cut a piece of a kitchen towel, wrap around the bottle, and tie to create a scarf
- glue a button to the bottom
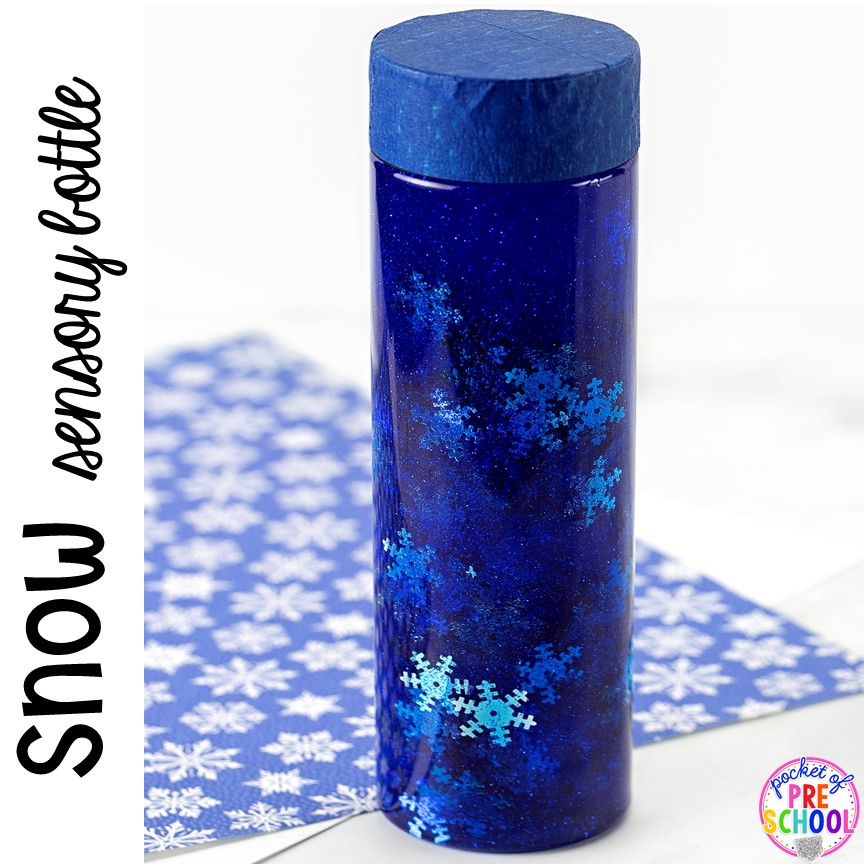
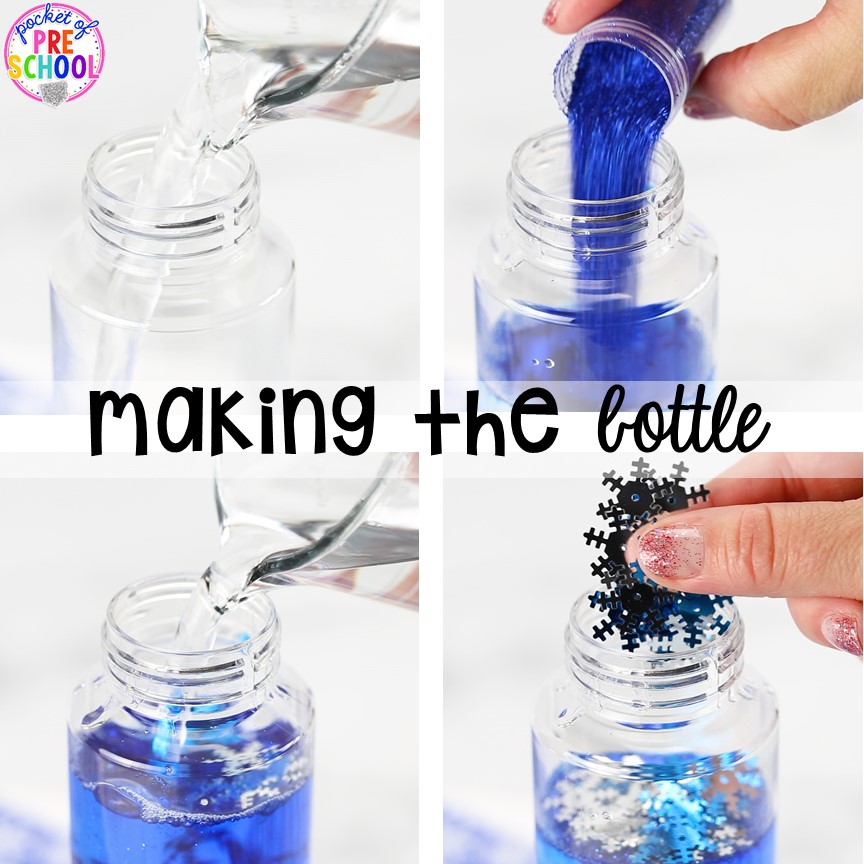
Snow Storm Sensory Bottle
- empty bottle
- fill halfway with water
- add 1/2 cup of clear glue
- add blue fine glitter and a few drops of blue liquid watercolor
- add snow sequins or table scatter
- fill to the top with water, leaving about 1/2 inch space at the top so there is room to shake
- hot glue or superglue the lid closed
- cover the top with blue tape
- glue a yellow star to the top
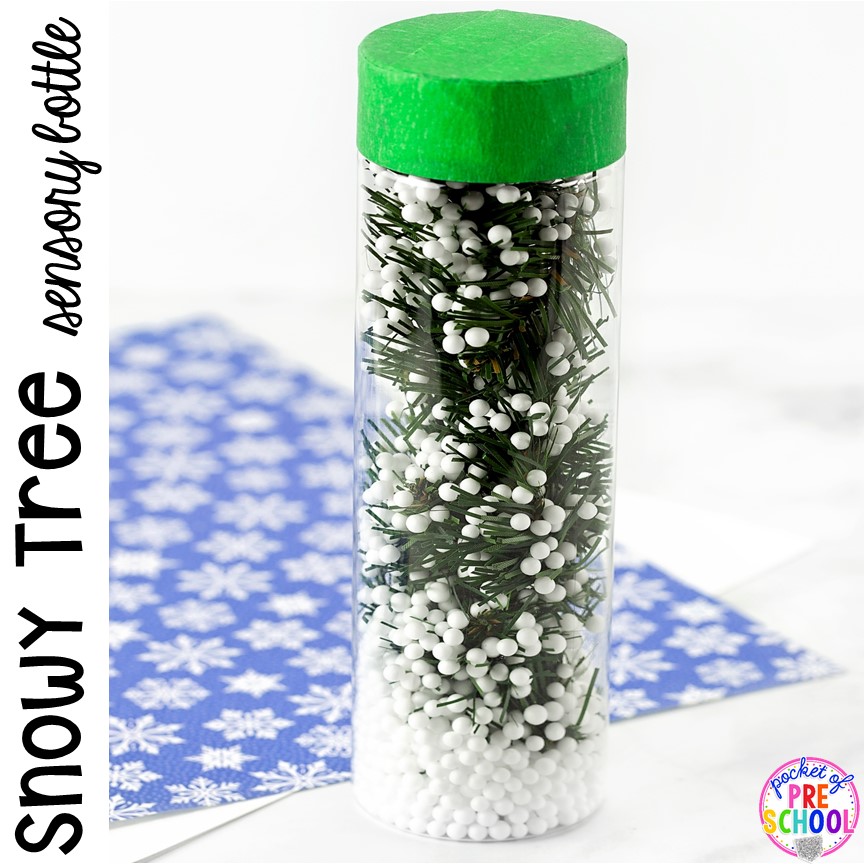
Snowy Tree Sensory Bottle
- empty bottle
- fill halfway with water
- add 1/2 cup of clear glue
- alternate white foam balls (these are from the Dollar Tree) and trees (cut small pieces from a wreath or evergreen floral stems)
- hot glue or superglue the lid closed
- cover the top with green tape
Grab your materials and make some amazing wintry sensory bottles for your students! Better yet, let them help you make them!
If you need more winter-themed activities, check out these posts!

Love it? Pin it!